The solution is surprisingly simple, upload WordPress on your ftp server, and since you don’t have a CPANEL, you can create a MySQL database using a free data provider outside of your web server such as freemysql.net or freesql.org . The details are listed in the following steps:
1. Download the latest version of WordPress from http://wordpress.org/.
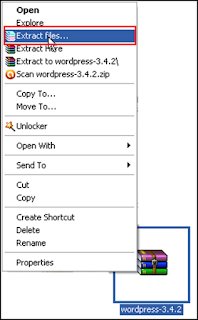
2. Extract the downloaded files.
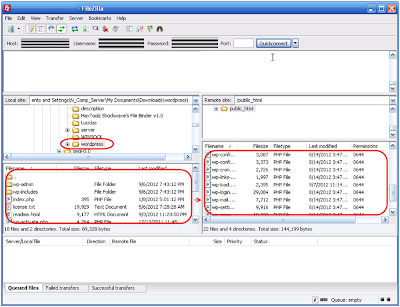
3. Start Filezilla(If you don’t have Filezilla installed, you can download it from http://sourceforge.net/projects/filezilla/files/FileZilla_Client/3.5.3/FileZilla_3.5.3_win32-setup.exe)>Enter your FTP server host, username and password then click quick connect.

4. Upload the contents of the wordpress folder to the public_html folder.
5. Open your web browser. Enter the URL of your site on the address bar.
6. Click Create Configuration File>Let’s Go button. The following should then appear.
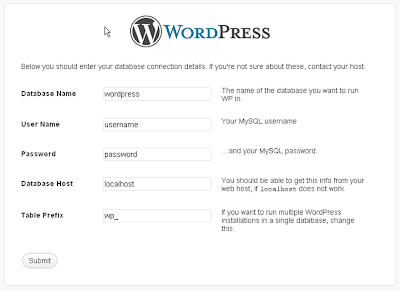
7. Since we do not have CPanel and we can’t obviously create a MySQL database file which is needed in this window>Press CTRL + N. This will open up a new browser window. Enter freemysql.net in the address bar. The following should then appear:

Freemysql.net is a great site that offers free MySQL database storage for FREE.
8. Click the client area> then register.
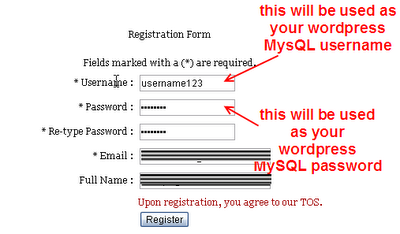
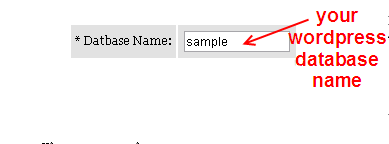
9.After you have registered. Login to your account and create a MySQL database file. Remember the name of the database file that you have made because that will be used as your wordpress database name.
10. If you look on the bottom of your freemysql.net account, you will see your host or server name:
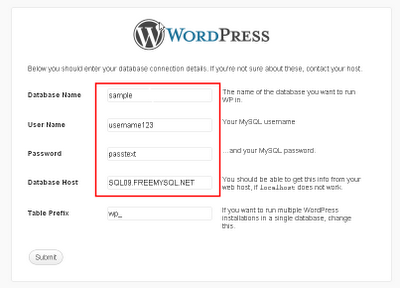
11. Now switch the browser screen to your WordPress configuration file then enter your freemysql.net database credentials>Click Submit.
12. Click the Run the Install button> And follow the on screen installation process to install wordpress.

Note: For more information, visit the wordpress official installation guide here http://codex.wordpress.org/Installing_WordPress. That’s all.