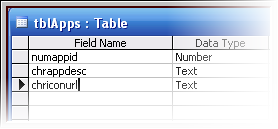
2. Name your table as “tblApps” no quotes. Add appropriate record values for instance:

3. Name your Access database file as “dbICons” no quotes and save it in My documents. Make sure to close Ms-Access before you start Visual C++ 2008, otherwise you’ll get an “Already in use” error in the database connection part.
4. Click Start>All Programs>Microsoft C++ 2008 Express Edition.
5. Click File>New>Project>Select CLR from the Visual C++ Project Types tree view>Select Windows Forms Application from the Visual Studio installed templates pane>Enter your desired project name then click Ok.
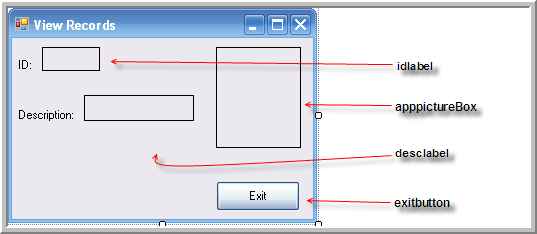
6. Design your form as follows:

7. Just use the suggested control names above so that you will not get lost later on in this tutorial. To name a control, just select the control and change its name property value in the properties window.
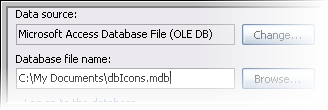
8. At this moment we will now specify the name of our database that we wanted to connect to. To do that, click the Tools menu and select Connect to database:

9. Select Microsoft Access Database File (OLE DB) as a data source value then locate dbIcons and assign it as a Database filename value.

10. Click the oledbDataAdapter control from the general category of the toolbox and drag it to your form. There instances wherein the oledbdataadapter is not shown, to show it, click Tools>Choose Toolbox items>type “ole” not quotes in the filter textbox> then check everything that starts with “ole” then click the Ok button.
11. Once you have added an oledataadapter control, the data adapter configuration wizard will then come into view. If you noticed the table that you have connected previously (using step 8-9) is selected as a default value of the “what data connection should the data adapter use?” listbox. If not then click the listbox button then select “dbIcons” then click the Next button.

12. In the Choose a command type window, select the Use SQL statement radio button then click Next.
13. In the Generate SQL statement window, type “SELECT * FROM tblApps” no quotes in the blank pane then click Next>Finish.
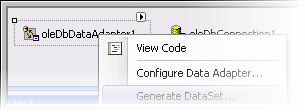
14. Right-click>OleDbDataAdapter form the component tab>generate dataset>Ok.

15. Double-click your form then add the following in the Form_load event.
//Populates the dataset
this->oleDbDataAdapter1->Fill(this->dataSet11,"tblApps");
16. This will fill our dataset with record values from our database.
17. Bind the fieldname to an appropriate control using the following syntax:
this->objectname->databindings->add(gcnew Binding(“Property”, datasetname,”Tablename.fieldname”);
Add it below the oledbdataadapter.fill line. Your code should now look like this:
private: System::Void Form1_Load(System::Object^  sender, System::EventArgs^  e) {
//Populates the dataset
this->oleDbDataAdapter1->Fill(this->dataSet11,"tblApps");
//bind idlabel to the numappid fieldname
this->idlabel->DataBindings->Add(gcnew Binding("Text",this->dataSet11,"tblApps.numappid"));
//bind desclabel to the chrappdesc fieldname
this->desclabel->DataBindings->Add(gcnew Binding("Text",this->dataSet11,"tblApps.chrappdesc"));
//bind appPictureBox to the chriconurl fieldname
this->apppictureBox->DataBindings->Add(gcnew Binding("ImageLocation",this->dataSet11,"tblApps.chriconurl"));
}
18. Click the run icon to start debugging, you should see the following outputs:
No comments:
Post a Comment
Note: Only a member of this blog may post a comment.